From the Coach’s Clipboard Basketball Playbook
The Triangle half-court offense was originated by Sam Barry at the University of Southern California many years ago. It was further developed by former Kansas State head coach Tex Winter, who had played under Barry. Later Winter became assistant coach to Phil Jackson and the triangle offense was instrumental in the Chicago Bulls (Michael Jordan, et al) winning a number of NBA championships. Winter has also been a consultant to the LA Lakers.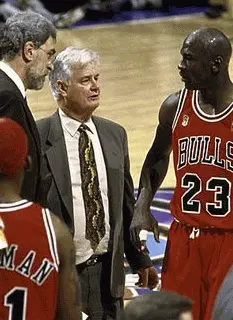
Phil Jackson, Tex Winter and Michael Jordan
The offense is detailed and takes a while to learn, but is very effective once players learn how to read and react to the defense. The offense can confuse the defense as it can be initiated in many different ways - not the same way with every possession (see "Establishing the Triangle" below).
Spacing is key, with players about 15-18 feet apart. The basic structure of the offense is the "sideline triangle" on one side of the floor, and a "two-man game" on the weakside. The sideline triangle is formed by a post player on the block and two perimeter players, one in the corner and one on the wing, and can be set up on either side of the court (diagrams A and B). The "two-man" weakside offense consists of a guard at the top, and a player at the weakside elbow-extended area. Players can interchange, but it's usually best to have two post and three perimeter players.
This page (part 1) discusses the many sideline triangle entries and triangle options, as well as post offense. The 2-man game options (weakside and strongside) and counters (reading and reacting to the defense) are discussed in part 2 - Triangle Offense 2-Man Game Options.
The spacing stretches the defense to defend both sides of the court, and this creates a problem for the helpside defense and defensive trapping. Unlike a free-lance motion offense, players should fill the five spots. But like a motion offense, players read and react to the defense without having to call set plays.


Establishing the Triangle - Entries
First we will outline the many ways, or entries, of getting into the set. This can be confusing to the defense, and there is a counter for just about anything the defense throws at us. In each case, we want the ball on the wing and establish the sideline triangle.1-2-2 set
Starting in a 1-2-2 set (diagram C), O5 and O4 down-screen for O2 and O3, who cut out to the wings. The pass goes from O1 to the wing O2. O1 cuts to the ball-side corner, and the triangle is formed, with O5 in the low post. The weakside wing O3 moves up to the top and the weakside post player O4 moves to the weakside elbow-extended area. O2, O1 and O5 form the sideline triangle. O3 and O4 are positioned to run the "two-man game".Point guard inside cut
O1 passes to O2 and cuts inside (diagram D), off O5's screen (near the ball-side elbow). O2 has the option of passing to O1 on the give and go for a possible lay-up from O1 (diagram E). If the pass from O2 is not there, O1 moves to the ball-side corner (diagram D), while O5 drops back down to the block.Or O1 could cut through to the opposite corner (diagram F). In this case, the ball is reversed to the top to O3, and then to O4 who has stepped out on the wing, while O5 cuts to the left block - and now the triangle is established on the left side. O2 and O3 would now be the weakside "two-man game", with O2 dropping inside near the weakside elbow.


Point guard outside cut
In diagram G, O1 passes to O2 and cuts outside O2 to the corner, and the triangle is set. An option here is a hand-off from O2 to O1. If the X1 defender is screened by O2, O1 can drive to the hoop (diagram H). Recognizing this, O5 slides up to the elbow for spacing and a possible pass there from O1.


If the X1 defender goes under the screen (diagram I), O1 could pull up and shoot the jump shot. If the X2 and X1 defenders switch the screen (diagram J), O1 and O2 run a pick and roll.


Dribble entry - wing pass denied
When the pass to the wing is denied, O1 can dribble to the wing, as O2 slides down to the corner (diagram K). With X2 overplaying the pass, O2 could back-cut for a pass from O1 (diagram L). Here again, O5 slides up to the elbow.Diagram M shows O1 dribbling right and O2 cutting through to the opposite corner. The ball is reversed from O1 to O3 on the top, and then to O4 (who has stepped out to the wing). O5 cuts to the left block, and now the triangle is established on the left side. O1 and O3 are now the "two-man game".


Weakside guard cuts to ball-side corner
Diagram N shows O1 passing to O2, but this time O3 cuts through to the ball-side corner, while O1 replaces O3 at the top.Weakside post cuts to ball-side corner
Diagram O again shows O1 passing to O2. O5 screens for O4 and O4 cuts to the ball-side corner. O3 drops into the weakside elbow to replace O4, and O1 replaces O3 at the top.Any player could play the low post
Although O5 and O4 are our main post players, any player can post up on the low block. This strategy is effective when there is a size mis-match with one of the guards, or if a perimeter defender is in foul trouble - so we post up his man and try to draw another foul. We simply move O5 out to the corner and let another player take the low post. Diagram P shows O1 posting up. Diagram Q has O3 in the post (O1 replaces O3 on top). In diagram R, O4 posts up, while O3 drops inside to replace O4 and O1 replaces O3.


Weave-screen (dribble hand-off) entry
Another way to get into the offense is with a dribble hand-off (diagram S). O1 does a weave-screen (dribble hand-off) with O3. Often the X2 defender drops inside to hedge on the dribble by O3. This allows for an easy pass to O2 on the wing, and O3 cuts through to the ball-side corner. O1 moves to the top.
Wing denial - ball reversal
We've already discussed on wing denial that O1 could simply dribble to the wing. Another option (when the wing pass is denied) is to reverse the ball to the opposite side. In diagram T, O1 passes to O3 and cuts through to the opposite corner. O3 passes to O4 on the wing and O5 cuts to the left low block. O2 moves to the weakside elbow-extended area.


Diagram U shows the same reversal but with O2 cutting to the opposite corner, and O1 dropping inside to the weakside elbow-extended area. Diagram V again shows the ball-reversal, but this time O3 cuts to the corner, with O2 dropping inside to the weakside elbow-extended area.
Another example of ball-reversal is a skip pass from the low post to the opposite wing (diagram W). O2 passes in to O5. O1 cuts baseline for a possible hand-off from O5. If the hand-off is not there, O1 continues through (getting a screen from O4) and moves to the opposite corner. O5 skip passes to O3 on the opposite wing and O1, O3 and O4 create the triangle.


Diagrams X and Y show reversal again, beginning with O2 passing to O1 in the corner, and then making a give and go cut. O2 goes through, again receiving a screen from O4. O5 now runs a pick and roll with O1. As O1 dribbles around O5's screen into the top seam, in addition to the pick and roll options, or a jump shot from O1, there is an option for ball reversal with a kick-out pass to O3 on the left wing. The triangle again is established with O3, O2 and O4.
Sideline Triangle Options
We have already discussed above some hand-off and pick and roll options between O1 and O2 (on O1's outside cut to the corner), and a give and go option on O1's inside cut to the corner. When the ball is on the wing, the first option is always to look to pass into the post. The post player can make a strong post move (discussed below), or we can run one of these options.Corner pass options
Look back at diagrams X and Y above. O2 passes to the corner and cuts through for a give and go pass from O1, while O5 slides up to the elbow (for spacing). If the pass is not there, O2 cuts opposite, and now O5 screens for O1, running the pick and roll.Post-split
Diagram Z - either O2 or O1 passes into the post O5. O1 and O2 cut around O5 with the passer cutting first. A hand-off from O5 (or a little dump-pass) can get O1 or O2 an easy shot. If the X5 defender, gets more concerned about helping stop the cutters, O5 could fake a hand-off and make a strong move to the hoop.Post-split off corner screen
Diagram 1 shows O2 screening for O1, and then splitting the post along the baseline. O1 splits O5 in the top seam.


High post-split
The high-post split features three cutters (diagram 2). O1 initially cuts baseline on the pass to O5. O2 splits O5 in the top seam into the lane, while O3 cuts inside and splits O5 on the low side. O5 could drop the pass off to any of the cutters, or make his/her own move. O4 rotates up top as our safety, and for spacing for O2's cut.Wing screens opposite
Diagram 3. After passing into O5, O2 screens opposite for O4. O4 comes hard over the screen for a possible pass from O5 and an elbow jump-shot. O1 cuts baseline. Without calling anything special here, you can make this a routine screen whenever a guard cuts into the top seam and does not receive the ball - he/she then screens for the weakside post (O4).


Wing dribble-drives the top seam
Diagram 4. Any time the wing's defender (X2) drops inside to help prevent the pass to O5, O2 can dribble-drive the top seam into the lane for a lay-up, pull-up jump shot, dump pass to O5, or kick out pass to O3 on the opposite wing. With X2 sagging inside, O2 could also shoot the 3-point shot.Back-door lob to weakside post
Diagram 4B. When the pass from the wing to the top is denied, O4 cuts to the ball-side elbow for a pass. If this is being denied, O4 back-cuts for the lob from O2"Runner" or "Circle"
Diagram 5. The wing player can trigger O1 to clear out and run the baseline to the opposite corner by yelling "runner", or "circle". Now O2 and O5 play a two-man game with O5 ball-screening for O2 (pick and roll). Other options off this strong-side two-man game are discussed below.


"Clear" - clear out for wing
Diagram 6. O2 calls "clear" or "C" to clear out the side, so he/she can take the X2 defender 1-on-1 (diagram 7). O1 cuts to the opposite corner, O5 moves to the opposite elbow, while O4 moves to the opposite wing.Post Offense
A strong low post offense is a big part of this offense. The pass to the low post is always the first option. Now we will discuss low post options, and reacting to the post defense.Post being full-fronted
Diagram 8. Here the X5 defender is full-fronting the post O5. If O4 stays high on the weakside, there often is no helpside defender. O5 pins X5 outside and O2 makes a lob pass to O5. We can also feed the post from the top. Diagram 9 shows O5 sealing the X5 defender as the pass goes to the top. A quick pass from O3 to O5 is another chance for a power lay-up. Diagram 10 shows a feed from the high post O4. Again, O5 seals the defender and gets the pass inside.


Post being half-fronted from the top
In diagram 11, the post is being half-fronted from the top. O5 seals X5 as the pass goes to the corner. It's usually a curl bounce pass from O1 to O5, and O5 makes the power baseline move.


Post being half-fronted from the baseline side
In diagram 12, the post is being half-fronted from the baseline side. O5 seals X5. If O2 takes one hard dribble toward the top, the left-handed bounce pass can then be made directly into O5. O5 makes the jump hook or baby hook into the lane.Post defender playing behind
In diagram 13, the post defender X5 is playing behind O5. O5 seals X5, and O2 has an easier pass into O5. O5 can make one of many post moves, or pivot, face the defender and shoot, or shot-fake and go to the rim.Isolate the post
Diagram 14 shows how we can isolate the low post player and let him/her take the X5 defender 1-on-1. O2 passes into O5, and then lateral screens for O3. O1 cuts baseline and then screens for O4. This cutting and screening action occupies the other defenders, allowing O5 to go 1-on-1.


Avoiding the post double-team
If the post player gets double-teamed a lot, O5 can avoid this trap by moving to either the short corner or the high post. If the double-team comes from the opposite wing X3 (diagram 15), O5 moves toward the short corner, as this is usually too far for the helpside defender to venture. If the trap comes from the opposite post (diagram 16), O5 moves up to the elbow, again too far away for the opposite post helpside defender.Skip passing from the double-team
If the post player gets double-teamed (diagram 17) by the opposite wing defender X3, a skip pass to the vacated wing is usually a good option. Notice how O1 cuts to the weakside corner (getting a screen from O4), while O3 spots up on the wing. The X4 defender will have difficulty covering both O3 and O1 (diagram 18). And there will often be a mis-match in the low post with O4 being defended by X1. O3 can make the extra pass to a wide open O1 in the corner, or into the post mis-match.

See part 2 of this article, the Triangle Offense 2-Man Game Options which discusses both the weakside and strongside 2-man options, as well as tips on reading and reacting to the defense.
In summary, the Triangle Offense features good spacing, cutting, passing, post play, and a basic set with five spots that must be filled. From there, it's basically learning to read and react to the defense and take what the defense gives you.
The article in the members section and Playbook includes a detailed Animation!
Related page:
Want More Coaching Content?
Get access to more complete articles, diagrams, and coaching tools with Premium Membership.
View Membership Options